This Breakfast Charcuterie Board is piled high with sweet and savory favorites and makes the perfect offering for any gathering, get-together, or brunch with friends. This board can be made start to finish in under an hour and is sure to impress.

Jump to:
I love charcuterie! Building beautiful boards, creating the perfect bite, I am all about it. A breakfast charcuterie board is such a fun offering for morning or midday gatherings like Galentines parties, Mother's Day brunches, or baby showers.
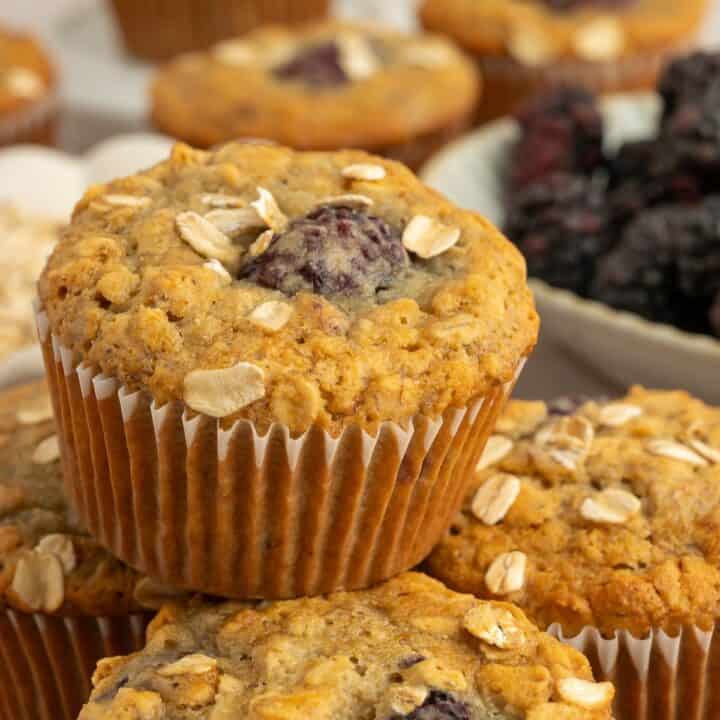
Need some healthy and homemade recipes to fill this board? Try these Crispy Paleo Waffles, this Paleo Almond Butter Banana Bread, this AIP Breakfast Sausage, these Sugar-Free Gluten-Free Banana Muffins, or these Gluten-Free Blackberry Muffins.
What I Love About This Recipe
Breakfast/brunch charcuterie is a winning option for any mid-day party or gathering. Here is why I love this board:
- The beauty of a brunch charcuterie board is that there is something for everyone and people can serve themselves exactly what they want. Everyone’s happy and satisfied!
- This breakfast board is beautiful, fun, and simple to make, even for a charcuterie novice.
- A breakfast or brunch board never fails to impress. Your guests will love the creativity of it.
For another fun charcuterie board, check out this Christmas Tree Charcuterie Board.
Ingredients

Here are the ingredients I used:
Protein - I chose bacon, sausage links, hard-boiled eggs, and Greek yogurt.
Carbs - I used my very popular paleo waffle recipe to make mini waffles using a small Dash waffle maker and purchased tiny gluten-free baguette toasts.
Fruit - Strawberries, blueberries, and oranges slices were the fruits used on my board.
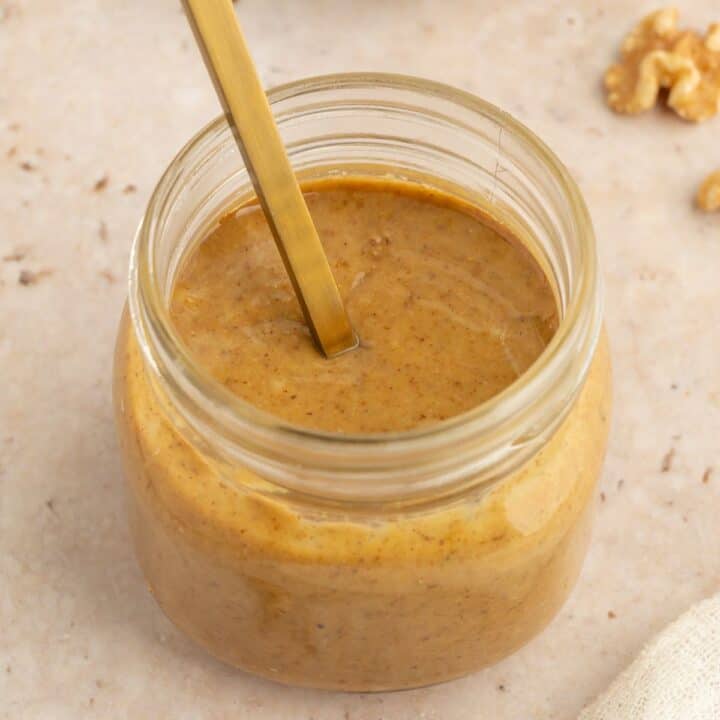
Toppings or Spreads - I offered honey, maple syrup, butter, raspberry jam, walnuts, and granola (for the yogurt).
See the full ingredient list and measurements in the recipe card below.
Selecting Ingredients for Your Board
Choose foods of different shapes and sizes or that can be cut in ways to create visual interest and make sure you have some smaller items that allow you to fill the holes in the board. Consider how many people you are serving and what these people typically enjoy eating, along with any dietary restrictions.
Here are some ideas:
Protein - Bacon, sausage links, hardboiled eggs, Greek yogurt, turkey bacon, candied bacon, prosciutto, vegetarian sausage, salami, sausage patties, hard cheeses, or Canadian bacon.
Carbs - Mini donuts, silver dollar pancakes, English muffins, mini bagels, pancakes, donuts, mini muffins, crepes, toaster waffles, sourdough toast, and hashbrown patties. This Chickpea Flour Banana Bread is a great healthy option!
Fruit - Pineapple, strawberries, blueberries, orange slices, apple slices, blackberries, cherries, sliced peaches, cut melon, mandarin oranges, and grapes. Smaller fruits like berries or grapes can be used as fill between the large items.
Toppings and Spreads - Honey, maple syrup, butter, raspberry jam, walnuts, granola, avocado, bacon jam, vegan butter, Nutella, peanut butter, olive tapenade, spreadable cheese, almonds, chia seeds, herbed butter, and marmalade. Make sure toppings and spreads will complement the other items on your board.
How Much Food to Prepare
The amount of food you need for your board will depend on how many people you are serving and how hungry your guests are. If this is your main offering, I would recommend 2-3 servings of protein, 2-3 servings of carbohydrates (obviously, the fruit and some of the toppings are considered carbohydrates too, but I am referring to bread products/baked goods), and about ½ cup of fruit per person. Offer enough toppings and spreads to dress everything on the board. Too much food is better than too little and you can use extra prepped food to refresh the board throughout the gathering.
Aim for:
- 2-3 servings of carbohydrate foods per person
- 2-3 servings of protein foods per person
- ½ cup of fruit per person
- Appropriate toppings to dress everything
How to Make a Brunch Charcuterie Board
Step 1: Clean and lay out your board. If you are serving a large group, you can tape down a piece of parchment paper or butcher paper to a kitchen island or a tabletop to make an extra-large breakfast “board”.
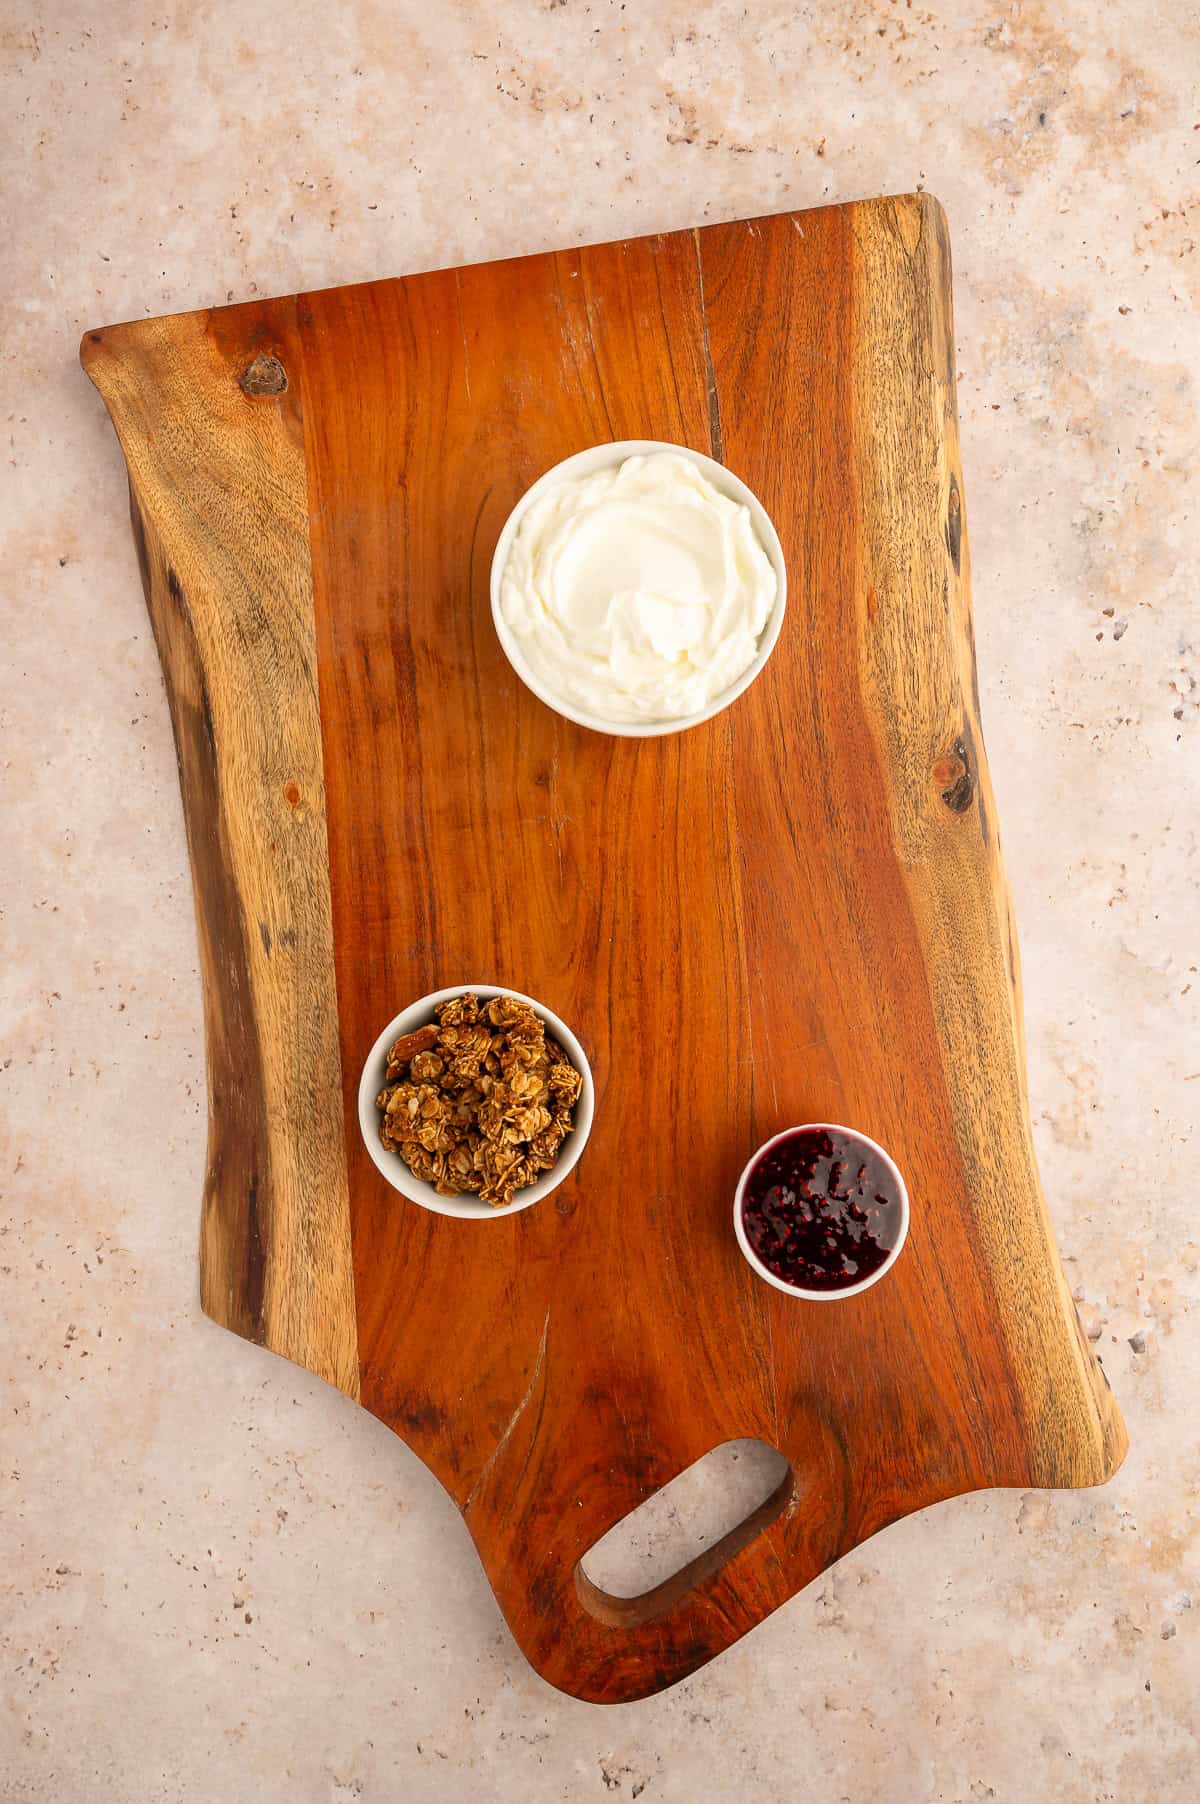
Step 2: Generally, I will start by placing 3 of the larger ramekins in a triangle orientation on the board. This will give you something to work around.
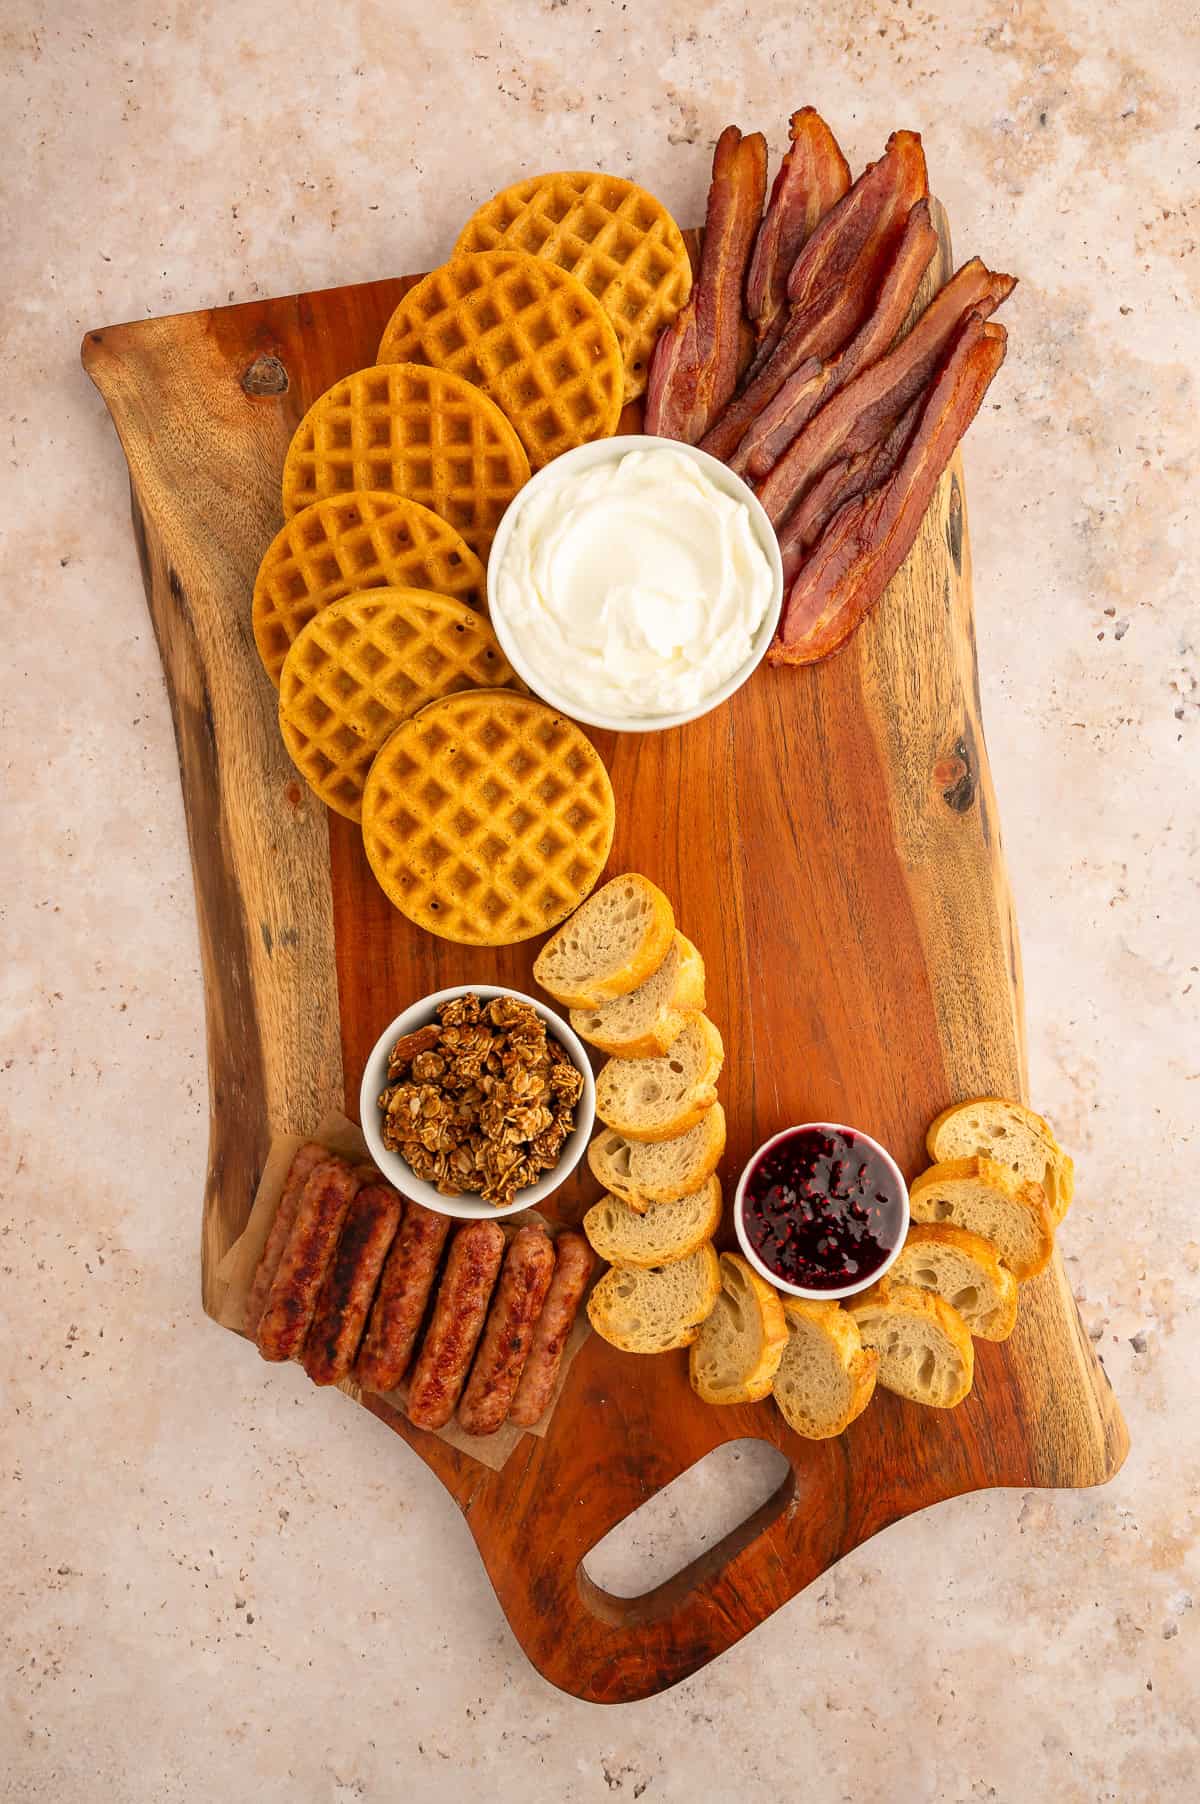
Step 3: Next, place some of the larger items that you can fan out (waffles, bacon, toast, etc.). I usually fan around the initial ramekins.
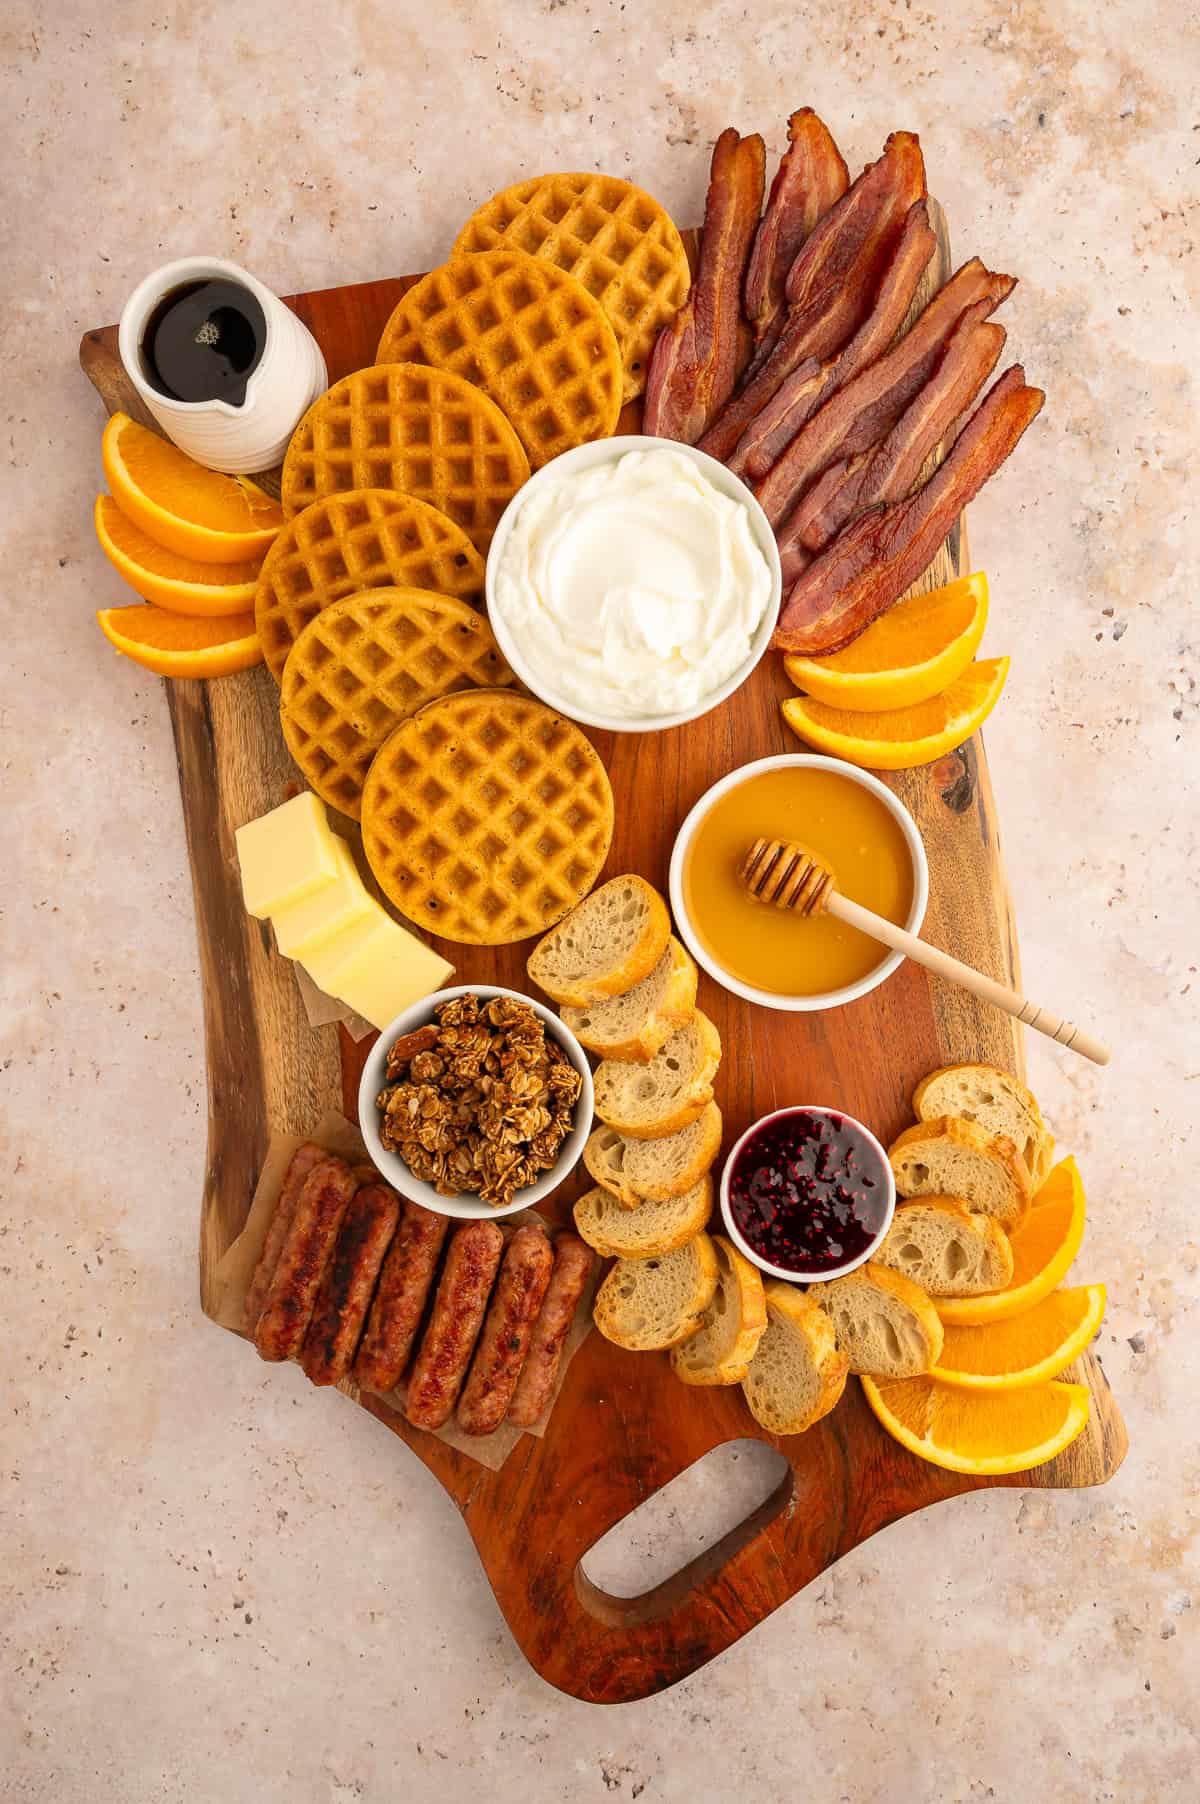
Step 4: After most of the larger items have been placed, you can add any additional ramekins you have left. Try to space them out so that they are not next to one another.
Step 5: Next, work on placing the medium-sized items to fill some of the larger holes on the board.
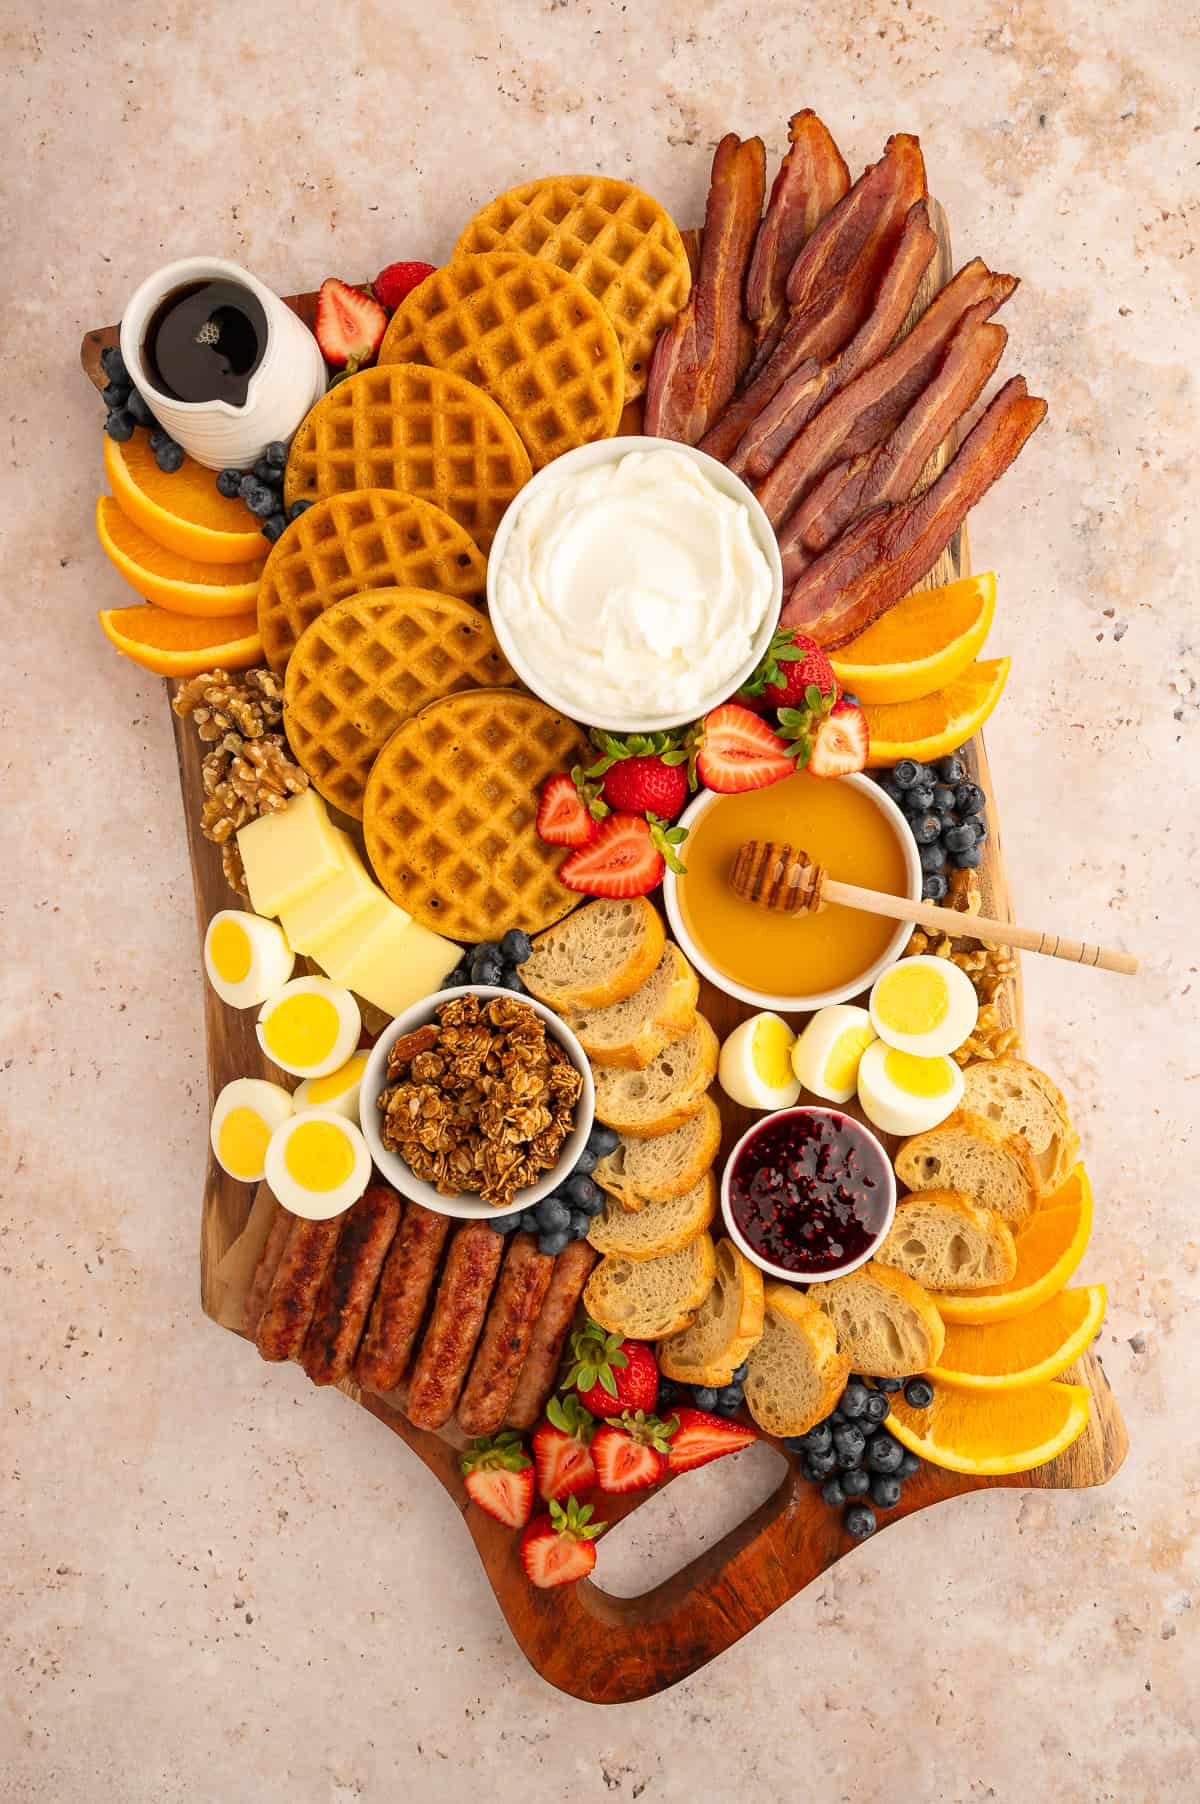
Step 6: After most of the board is filled, take the small items (berries, nuts, etc.) and use them to fill the gaps. Think functionally when finishing your board. You want the board to be full and beautiful, but you don’t want it overfilled so that people cannot serve themselves.
Step 7: Add any serving spoons and spreading knives that guests will need. Serve immediately.

Commonly Asked Questions
Not all the foods on this board are shelf stable, so it is important to prepare the board right before guests arrive. The board will likely be difficult to move and might not fit in the fridge. If you want a little head start, you can build the board but wait to add the meats and anything that requires refrigeration until right before serving, keeping these ingredients warm and cold, respectively.
Once served, the board should be safe to consume for at least an hour at room temperature. I wouldn't recommend saving any leftovers unless they do not need to be kept at temperature for food safety.
Yes! This board can easily be made gluten-free by selecting certified gluten-free items to use as your carb sources. Also, read the ingredients on any packaged items to ensure they do not contain gluten.
Try using these Crispy Paleo Waffles or this delicious Nut-Free Granola on your gluten-free board.
Absolutely. Select things like vegan meat alternatives, vegan butter, dairy-free yogurt, waffles, and bread products that are free of eggs and dairy, and substitute the honey with agave or another sweet spread for a perfect vegan board.
These Vegan Oat Pancakes and this Berry Chia Seed Pudding (Vegan) would work well on a vegan board!
Dietitian Notes
- Boards can be built to cater to any dietary need, so they can be a very inclusive offering for gluten-free, dairy-free, or vegan friends. You could also make separate boards for people with dietary restrictions.
- It is easy to make a breakfast board healthy by including fresh fruits, protein foods, and healthy carb sources - like these Almond Flour Banana Bread Muffins!
Tips For Success
- When creating a board, select foods that you know your guests will enjoy. This board can be perfectly catered to your tastes and your guests.
- Aim for a cohesive board. You don’t want to have spreads that don’t pair well with anything, or flavors that don’t complement each other.
- Start by placing 3 ramekins in a triangle orientation, then place your items large to small. The smaller items work well to fill the gaps. If you do not place the larger items first, you will likely run out of space.
- For aesthetics, have a couple of items repeating in several areas throughout the board.

Try These Other Healthy Breakfast Ideas
Looking for other tasty recipes? Here are a few you might like


Did you try this Breakfast & Brunch Charcuterie Board?
I would love to see how it went! Share a photo and tag me on Instagram or leave a comment on Pinterest.
Love this recipe? Connect with me by leaving a comment below! 😊
📖 Recipe

Breakfast and Brunch Charcuterie Board
Equipment
- Large wooden board or serving platter
- Small ramekins or bowls (to hold anything liquid)
- Spoons
- Spreading knives
- Small plates for serving Optional
Ingredients
Protein (aim for 2-3 servings per person)
- 10 Sausage links cooked
- 8 Bacon slices, cooked cooked
- 5 Hardboiled eggs halved
- 1 cup Plain Greek yogurt
Fruit (aim for about ½ cup per person)
- 1 oz Strawberries
- 1 Blueberries
- 1 Orange cut into wedges
Carbs (aim for 2-3 servings per person)
- 6 Mini waffles 12 silver dollar pancakes
- 6 lb 6 pieces of toast cut into triangles 12 small pieces of toast (I used GF mini baguettes)
Toppings and Spreads
- ⅔ cup Granola I used GF granola
- ½ cup Nuts I used walnuts
- ½ cup Maple syrup
- ¼ cup Butter sliced into pads
- ¼ cup Honey
- ¼ cup Jam I used raspberry preserves
Instructions
- Start by preparing any items that require cooking, slicing, or toasting. While cooking my bacon and sausage, I made my mini waffles, and toasted bread, and cut the fruit. I purchased precooked hardboiled eggs and sliced them in half. All in all, this preparation took less than 30 minutes, but will vary based on what you plan to include on your board. Try to keep anything that needs to be kept warm or cold at temperature until right before you plate everything up.
- Transfer anything that requires a bowl or a dish to an appropriate serving container. The containers should be just large enough to contain the volume you plan on using so that you will have more room on your board.
- Clean and lay out your board. If you are serving a large group, you can tape down a piece of parchment paper or butcher paper to a kitchen island or a tabletop to make an extra-large breakfast “board”.
- Generally, I will start by placing 3 of the larger ramekins in a triangle orientation on the board. This will give you something to work around.
- Next, place some of the larger items that you can fan out (waffles, bacon, toast, etc.). I usually fan around the initial ramekins.
- After most of the larger items have been placed, you can add any additional ramekins you have left. Try to space them out so that they are not next to one another.
- Next, work on placing the medium-sized items to fill some of the larger holes on the board.
- After most of the board is filled, take the small items (berries, nuts, etc.) and use them to fill the gaps. Think functionally when finishing your board. You want the board to be full and beautiful, but you don’t want it overfilled so that people cannot serve themselves.
- Add any serving spoons and spreading knives that guests will need. Serve immediately.
Notes
- When creating a board, select foods that you know your guests will enjoy. This board can be perfectly catered to your tastes and your guests.
- Aim for a cohesive board. You don’t want to have spreads that don’t pair well with anything, or flavors that don’t complement each other.
- Start by placing 3 ramekins in a triangle orientation, then place your items large to small. The smaller items work well to fill the gaps. If you do not place the larger items first, you will likely run out of space.
- For aesthetics, have a couple of items repeating in several areas throughout the board.
foodbornewellness.com says
Such a fun and beautiful board!